In this post we will jump right into appengine coding with the ubiquitous “Hello World” example .
For the development we will be using eclipse IDE and google provides appengine plugin for eclipse .
The first step is to add the Google App Engine plugin in eclipse using Help menu > Software Updates… > Add site>.
The site url is:
http://dl.google.com/eclipse/plugin/3.4
 Restart eclipse after adding the plugin.
 You will see three new icons related to appengine created in eclipse toolbar as shown below
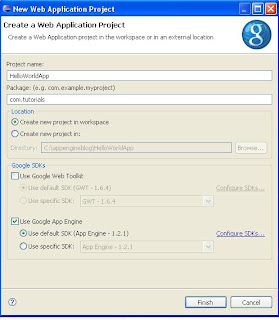
Create a new Web Application Project using File > New > Web Application Project as shown below


This launches your web application locally on port 8080. You can access your application by typing the URL: http://localhost:8080/ as shown below

Once you're done with your application and you already got the Google confirmation message, you can now create an application.
Log into google appengine through URL http://appengine.google.com/ and click the create an application button ,Type in a unique Application Identifier and the Application Title. This will be used in deploying your application as shown below


 When you click the Hello WorldApp Servlet it will display finally “Hello, world”.

No comments:
Post a Comment